
By Neil Patel, from Quick Sprout – http://bit.ly/RWzrMN
“Content audit” sounds a bit intimidating like something that involves ghastly amounts of time, endless spreadsheets, and dozens of unpaid interns.
The word “audit” is so tied up with other unpleasant life experiences that I totally understand if it doesn’t inspire you. But hang on for a second because a “content audit” might be what your site needs to get to the next level.
So, what is a content audit? A content audit is a careful look at your website’s existing content in order to make sure that it’s doing what you want it to do — driving the right kind of traffic, containing the right kind of keywords, and improving conversions.
The reason this is important is because the content of your website is the most important factor in your website’s existence. To be blunt, your content is your website.
That’s why a content audit matters. It’s about improving the very soul of your website – its content.
With crappy content, you have a crappy website. Now and then, it deserves a little audit action so you can find out what’s right about it, what’s wrong with it, and what might need to change.
But before we get into how you can audit your content, here is what you need before you can start:
What do I need to do an audit?
- Time: typically one to two hours.
- Tools: Google Drive Spreadsheet and Google Analytics.
- Personnel: you. If the task is huge, get a few people with a moderate level of skill and language facility to help you.
- Technical skill level: medium to low. If you have low technical ability, don’t worry. Once you do the first few pages, you’ll get the hang of it pretty quickly.
- Writing skill level: average ability in the target language.
- Amount of boring and mind-numbing work: medium.
Create a spreadsheet
Now that you have the necessary tools, let’s get started by going to Google Drive and creating a spreadsheet.
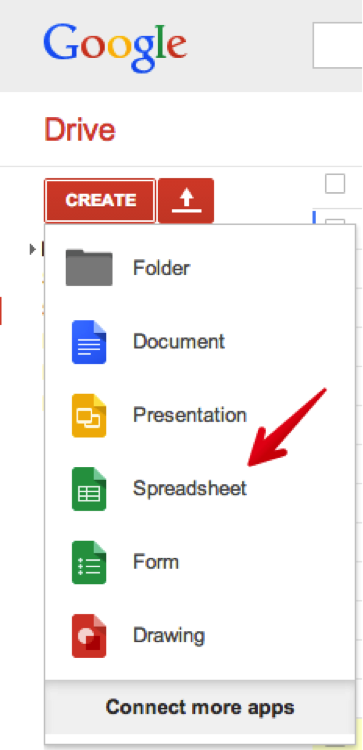
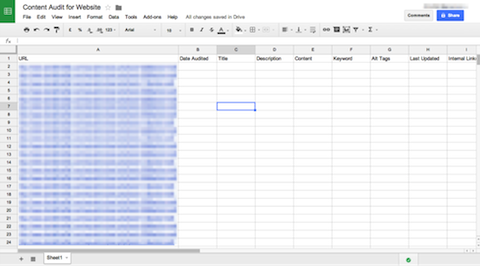
Create the following columns in your spreadsheet: URL, Date Audited, Title, Description, Content, Keyword, Alt Tags, Last Updated, and Internal Links.

Each row will contain data for a separate page on your website, starting with its url.
The purpose of this spreadsheet is:
- To allow you to come back and work on your audit at any time.
- To provide an easily accessible place for navigating to the pages you need to audit.
- To track exactly what you’re doing and when you’re doing it.
- To allow collaboration with other users. You can provide shared edit access to other team members so they can help you with the audit. Because it’s cloud-based and updated in real time, you shouldn’t have any work overlap.
Go to Google Analytics to create a list of all the pages on your site
Go to Google Analytics. Navigate to the “All Pages” section.
Behavior > Site Content > All Pages
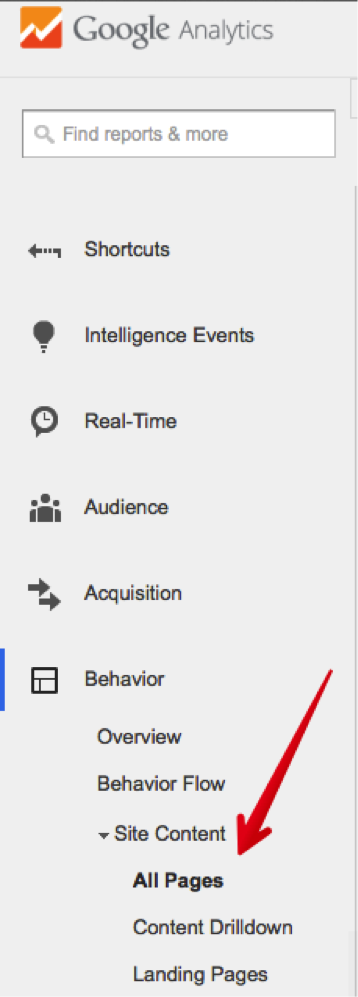
In this step, you’re going to get a list of the most-visited pages on your website. The reason why I recommend doing it this way is because this will help you audit your most important pages first. I’m all about low hanging fruit. This will give you results as soon as possible.

In the “Page” column, click on the link pop out button next to the page title.
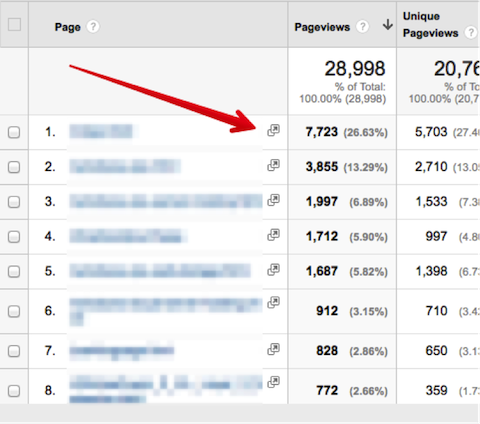
Copy the URL in the page that opens and paste it into the first column of your spreadsheet.
Continue the process for every page on your website.
Warning: If you have a huge site with thousands of pages, this could take a while.
To display all the pages on your site in a single screen (or to decrease the number of screens for bigger sites), expand the “show rows” menu at the bottom of the display chart and choose an appropriate option.

Alternatively, if you are a WordPress user, you may wish to create this list by pasting the edit URL for each page rather than the actual page URL. This way, you can click on the link and start editing the page.
Here’s how to do it: login to WordPress, go to “Posts” > “All Posts.”
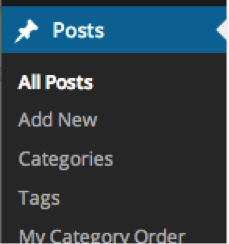
Click on “Published” at the top.

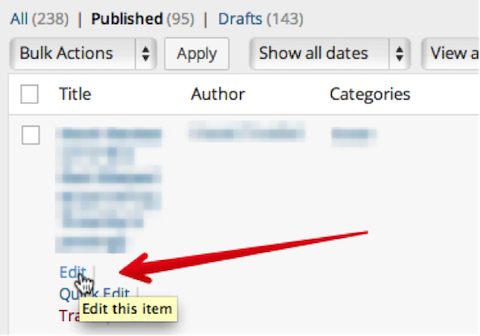
Mouse over the first entry, then mouse over the “edit” option.
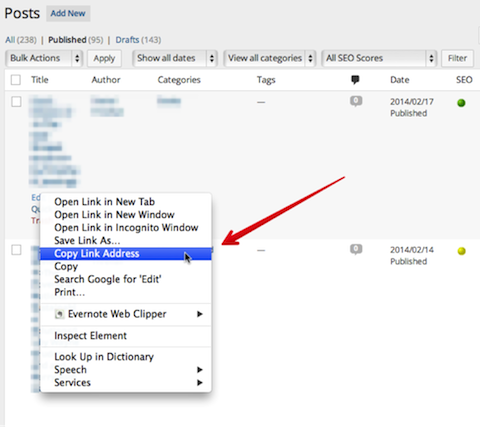
Right-click to bring up the menu and click “Copy Link Address.”
Paste this into your Drive spreadsheet.
Go to “Pages” > “Published” and repeat the process.
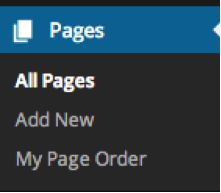
Although this does not deliver an ordered list of high traffic pages, it does give you an easily accessible list of pages to audit.
Now, your audit document is set up. You’re ready to roll.
Review each of the following items
Here’s where we get into the nitty-gritty of your audit. Roll up your sleeves and prepare to do some work.
The process is going to vary for every single CMS. Since WordPress is the most popular CMS and the one that I use and recommend, I’ve provided tips for WordPress users.
You don’t use WordPress? No problem! Every CMS that allows code access and even most CMSs that don’t allow code access will let you edit every one of these items.
I’m also a big fan of systematized processes. Do this process for a couple of pages, and you’ll start getting the hang of it. Then, set up your screens, figure out your keyboard shortcuts, get a system going, and you’ll fly through the rest of the pages.
In your Drive spreadsheet, you already have your table set up to record and fix each content audit category. As you move through each item, mark it in your spreadsheet. You can do this with a check mark or cell background color.

Now, audit each of the following items:
Check page title and URL
This is the lead element of a WordPress post or page.

Make sure it meets the following parameters:
- Up to 65 characters
- Unique
- Contains keywords
- URL should be text, not numbers or gibberish. Warning: If the page is live, don’t change the URL unless you put a 301 redirect in place! You’ll have to decide if it’s worth it to go to the trouble of setting up a 301 on pages for which you want to optimize the URL.
Check description
I recommend that you install the WordPress SEO by Yoast plugin in order to facilitate easy description editing.
If this plugin is in place, your audit process will go much faster. In fact, you can eliminate several of the columns in your spreadsheet and replace them with a Yoast column. That way, when you go to edit a page, you can make all the necessary fixes in the Yoast section, then mark it as done on the spreadsheet. It’s all about simplicity.
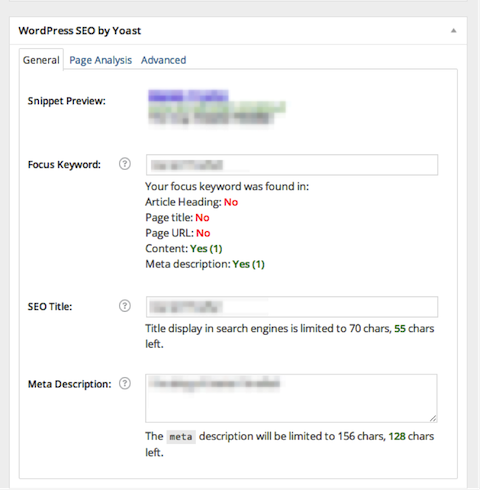
To audit your description, make sure it has these features:
- 160 or fewer characters
- Written for humans, not search engines
Check content
Now, you need to comb through the content on each page. Use the “visual” view tab.
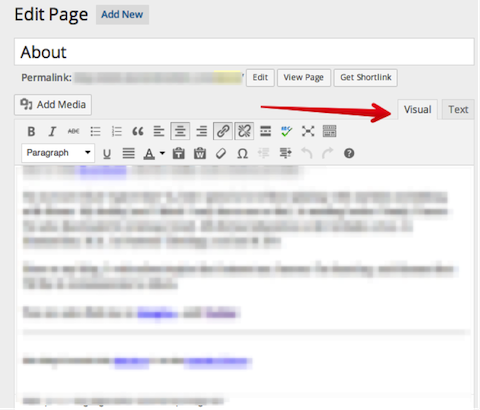
Check if your content is:
- Readable, interesting, helpful
- Grammatically impeccable
- At least 300 words per page
Check keywords
Make sure you have a mental or written list of your target keywords. This is going to be important as you audit the keywords for each page.
- Sufficient number of targeted long tail keywords.
- No keyword stuffing. No long tail keyword should appear more than five times on any page. Head terms may appear as many times as is natural.
Check alt tags
Make sure that every image is sufficiently tagged. In WordPress, click on the image edit icon.
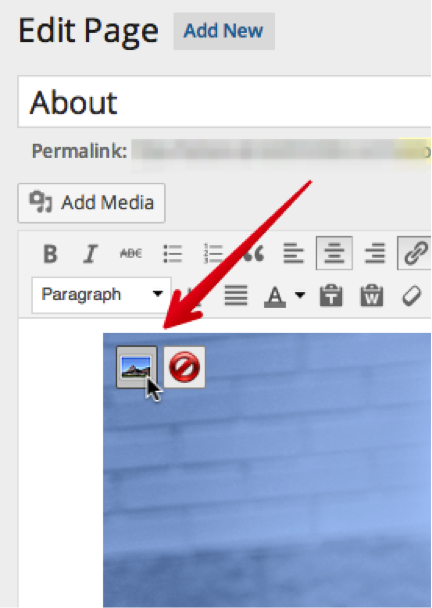
Then, add “alternative” text if it is blank.
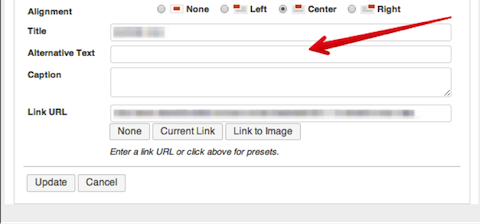
- Each image should have alt tags and title.
- Alt tags should be descriptive and contain any relevant long tail keywords.
Check last updated
In the right side of WordPress, you can see when the page was last revised. Click on “Browse,” next to “Revisions.”
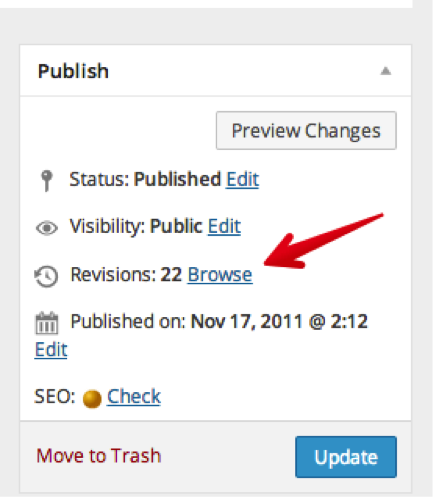
The top revision record that appears is the most recent.
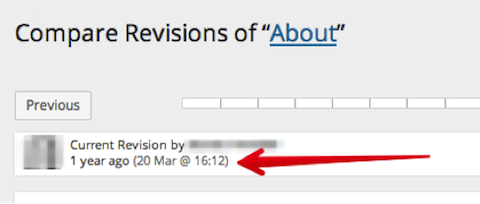
Each page should be reviewed and/or edited at least every 24 months. If you can do it more often, that’s even better.
Check internal links
Each page should contain internal links within the content. This does not include navigation menus, headers, or footers. “Internal links” refers to links with anchor text within the actual written content on a page.
- Two to three internal links is a minimum.
- Internal links should point to other deep pages, ideally content-rich blog articles. Do not link to the Home page, About page, or Contact Us page unless absolutely necessary.
Conclusion
Once you’ve done all the steps above, you’ll want to rinse and repeat on a regular basis. I myself do this once every six months to keep things simple.
Content audits can really freshen up a website, improve rankings, and gain some extra traffic. That is why you should do them on your website.
After doing a content audit, even on the top ten most-visited pages, I’ve seen sites experience skyrocketing ranking and traffic. It’s amazing how many old SEO techniques and mistakes exist on old pages. Without realizing it, you may be letting your traffic be inhibited simply as a result of outdated content.
A content audit is like a free traffic boost. Sure, it takes some time and painstaking effort, but – I assure you – the results are worth it.
What other tips do you have for doing a content audit?
